Multi-faceted evaluation of friction stir welding of dissimilar metals
Multi-faceted evaluation of friction stir welding of dissimilar metals
In recent years, reducing the weight of transportation equipment has become an important goal in efforts to reduce greenhouse gas emissions and more effectively use resources. Lightweight and tough materials are generally expensive, so to achieve high-quality, low-cost equipment, it is important to use multiple materials with different characteristics in the right places. In order to promote the use of multiple materials, in addition to the development of bonding technologies for dissimilar materials, it is essential to consider inspection and evaluation methods for bonding materials. In this example, friction stir point welding of dissimilar metals was evaluated in various ways using multiple observation and testing equipment.
■ Sample

- Bonding Material: High Strength GA Steel Foam Aluminum Plate
- Size: Length 100 min x Width 30 mm x Thickness 1 mm
- Pressurization time: Long, Short
- A correlation was confirmed between the sound field deformation by the ultrasonic optical flaw detector and the shear strength by the precision universal testing machine.
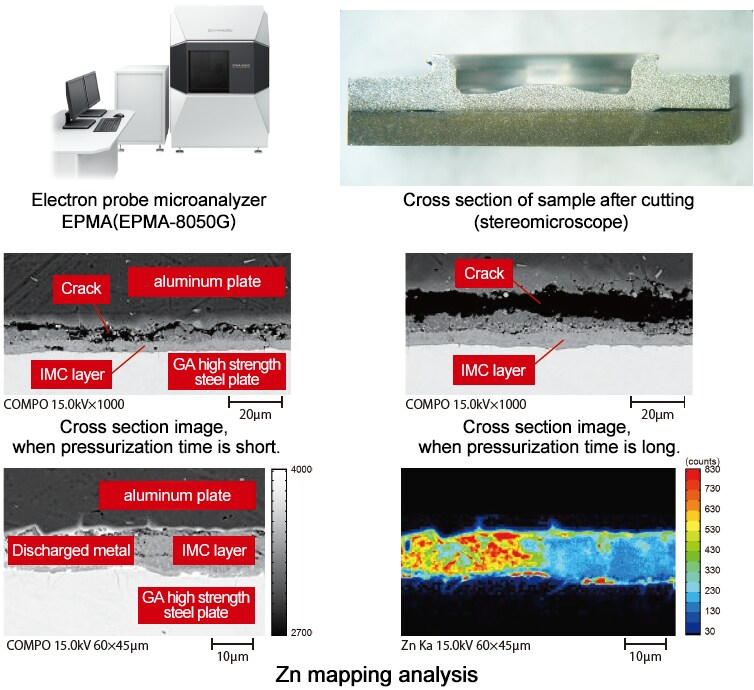
- From the cross-section observation of the electron microanalyzer, the crack width in the vicinity of the edge just below the joining tool was different between the two samples.
- It is assumed that the shear strength was affected by defects such as voids and cracks occurring inside the joint near the end just below the joining tool.
■ Ultrasonic flaw inspection to quickly screen for junction defects
- The presence or absence of defects varied depending on the junction conditions.
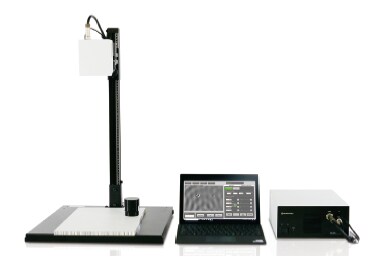
Ultrasonic optical flaw detector MIV-500
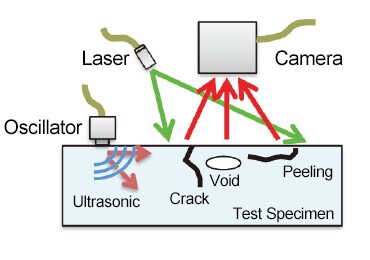
The image of ultrasonic optical flaw detection
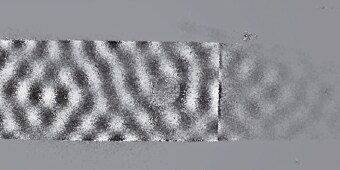
The sound field deformation
when pressurization time is short.
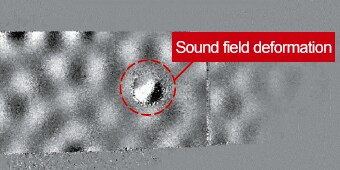
The sound field deformation
when pressurization time is long.
* Sound field deformation: Discontinuity of ultrasonic waves suggesting the existence of defects
■ Nondestructive observation for three-dimensional structure of a joint using an X ray CT system
- It is possible to observe gaps near the joint and measure the plate thickness which is said to be related to the joint strength.
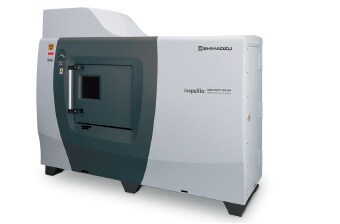
Microfocus X-Ray CT System inspeXio
SMX-225CT FPD HR Plus
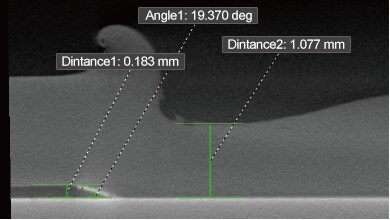
Measurement of plate thickness and gap near the joint
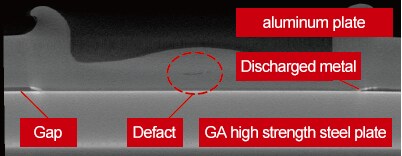
Cross-section image
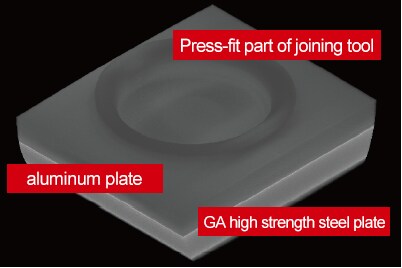
3D display image
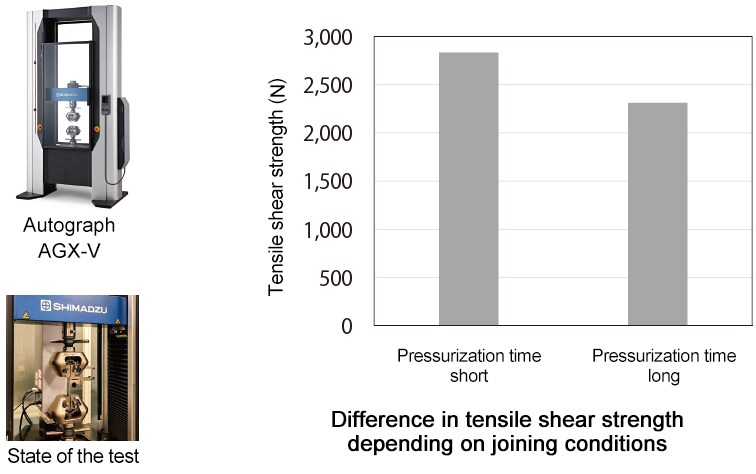
■ Accurately judge the quality of joints by a tensile shear test using a precision universal testing machine
- It is possible to measure the strength of the sample after defect inspection and internal observation.
- There was a difference in tensile shear strength depending on the joining conditions.
■ Investigate the cause of changes in shear strength by cross-section observation and composition analysis using an electron probe microanalyzer
- Fine observation of a sample’s cross-section and mapping analysis are possible.
- The crack thickness varied depending on the joining conditions.
Key points!
- By combining non-destructive observation and strength testing, it is possible to evaluate mechanical properties and factors that affect mechanical properties with the same sample.
- Our unique ultrasonic optical flaw detection technology is effective for inspection of joint conditions.


